Projects / FPGA Original post date: 02/07/2015

One of the biggest grief of using Windows 7 x64 is that I have to upgrade my programming tools. While I managed to find a cone Altera cable for $6, Xilinx clone was about $30. Even if I want to spend the cash, I would add yet another programming dongle to my collection. See picture of a subset of my collection so far.
Is there a different way of doing this? It turns out that Xilinx implemented a JTAG protocol that allow for remote programming access to embedded system over IP. If we can implement a user mode program that can communicate with the protocol and to toggle the appropriate JTAG signals, we've got ourselves a virtual cable that is fully supported by the ISE.
If you are using a linux machine, you can skip ahead and modify xvcd (Xilinx Virtual Cable Daemon) source code.
I ordered a ESP8266 earlier today while ordering parts for fixing my scope. I have been procrastinating of using it as a JTAG programmer. Someone did all the hard work and made a ESP8266 JTAG programmer. Sometimes it pays off.
----------------------------------------------------------------------------------------------------------
https://github.com/gtortone/esp-xvcd
ESP8266 Xilinx Virtual Cable
ESP8266 implementation of XVC (Xilinx Virtual Cable) protocol based on xvcd (https://github.com/tmbinc/xvcd)
----------------------------------------------------------------------------------------------------------
http://compgroups.net/comp.arch.embedded/esp8266-based-xilinx-virtual-cable-server/3029298
The first results seem to be promising, but unfortunately, I have found information about serious problems with XVC plugin in ISE14 (which still has to be used for older Xilinx FPGAs).
The problem is reported here:
http://forums.xilinx.com/t5/Design-Tools-Others/iMPACT-XVC-broken-with-multiple-devices/td-p/496232
And it is not clear if Xilinx is going to fix it :-(.
----------------------------------------------------------------------------------------------------------
Here is a little preview of what I am working on:

I made/planned for some changes:
- Level translation for the JTAG signal added.
- GPIO changes to HSPI pins.
- Firmware (long term goal). This is my first with ESP8266.
- Hotspot mode to Hotspot/AP
- Recode inefficient Arduino digitalwrite() to bare metal GPIO access and purge the dependency from their framework.
- Not sure if HSPI can help to speed up some of the JTAG bit shifting.
What the layout would look like:


I didn't do a good job on the toner transfer this time. There was a lot of shorts and a couple of broken traces that I have to patch. Even the USB micro connector has a couple of cracked traces at the pad. Anyways, it is all fixed up now.
The PCB fingers at the upper right hand corner is for a 3.3V serial connection for downloading firmware.
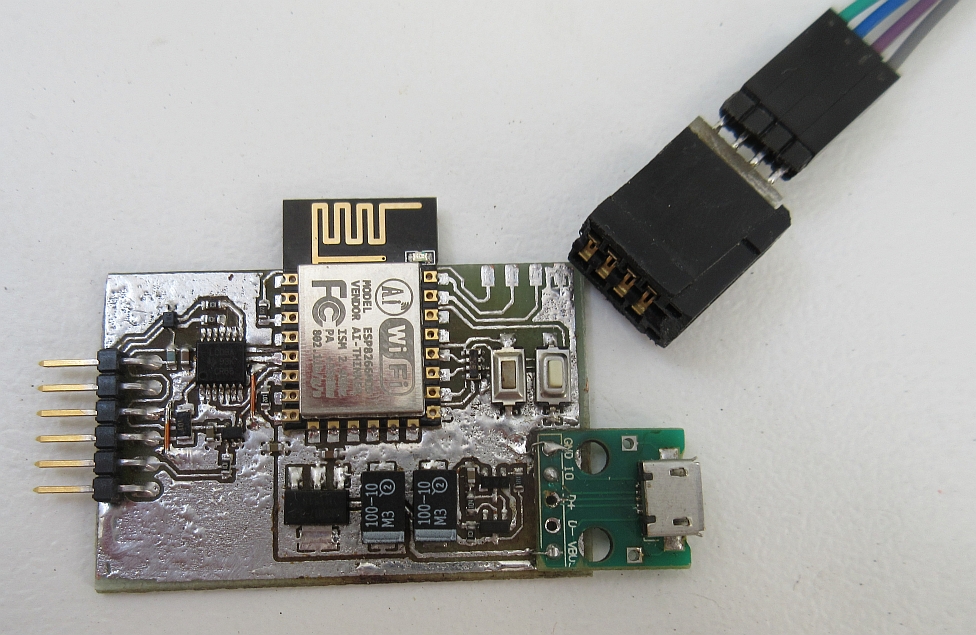
I replaced the header with a pairs of 3 pins rangle angle ones. I ordered the crimping pins to make the cable using my own wires as those premade "dupont" uses poor quality wires. I used some 2mm transparent heat shrink tubing to cover the labels which are printed with 6 points font.

Not sure if this install all the needed SDK.
links: https://arduino-esp8266.readthedocs.io/en/latest/installing.html
----------------------------------------------------------------------------------------------
I wasn't too happy with the design, so I have started a new design using a STM32F103.

Arduino ESP8266 installation
I want nothing to do with Arduino because their GPIO abstraction is plain bad. I think direct register level access to GPIO and the official API to IP stack is all I'll need in the long run. Before I do that, I'll need to at least get the original code working first. I used the instructions from here with the following changes:
- Step 2 I used the official link because the adafruit one does not work for ESP8266.
http://arduino.esp8266.com/stable/package_esp8266com_index.json
links: https://arduino-esp8266.readthedocs.io/en/latest/installing.html
----------------------------------------------------------------------------------------------
I wasn't too happy with the design, so I have started a new design using a STM32F103.
No comments:
Post a Comment
Note: Only a member of this blog may post a comment.